Monday, February 4, 2013

Easy Holiday Plates

Have you ever tried a craft project and it was so hard you just gave up?  I have tried about 500 of those projects.  They always look so easy but then you get into them and realize that you don't have the machine they used or the supplies they have.  That's when I try to "innovate" and try to either not use the machine and do it by hand or use a different supply and it all becomes a big, epic fail.  This project is nothing like that, it is easy and pretty hard to mess up.  

So, here we go, easy peasy holiday plates!
Supplies you will need: 
Clear, glass plate
Mod Podge
Paintbrush or foam brush
2 pieces of tissue paper


Crinkle up one piece of tissue paper. 
Uncrinckle and smooth out the piece of tissue paper

Apply mod podge all over the back of the plate.  You do not need to be extremely thick. 
Place the piece of tissue paper face down on the back of the plate.  
Smooth the paper over the back of the plate lightly with your fingers.  Don't be too rough or your tissue paper will tear. 
Wait 10-15 minutes. Cut around the edge of the plate. 


 Then, apply a coat of mod podge . 
Crinkle up and smooth out another piece of tissue paper. 


Wait another 10-15 minutes and apply another coat of mod podge.
Place the second piece of tissue paper face up on the back of the plate.  This will make the back of  your plate pretty also! 

Again, trim off the excess. 
Apply another coat of mod podge to the back and you are good to go!

These plates are super cheap to make (I spend about $4 per plate) and are great for cookies or as a hostess gift for any holiday!  The only caveat is that they cannot be put in the dishwasher and should really just be wiped clean vs. submerged in water for a long period of time.  


Wednesday, January 9, 2013

2013 To Do's


I'm a list maker.  I have lists all over.  I have one on my phone, several in my handbag, one on my ipad, probably a couple in my car, some at work and who knows where else I stick these little lists I make.  I even bought a notebook to keep all of my lists in but it didn't last very long because 1. it was too big for my bag and 2. I had so many lists in the one place that it was a little overwhelming.  I don't check off every item on my lists all the time and sometimes I make list and then throw it away a few days later.  But, making lists helps keep things in my mind.  If I write down that I need to buy cheese I am much more likely to buy cheese than if I just think about buying cheese.  Or if I have a list of 52 new craft projects I want to do if I have a list of the projects and what I need to buy for them I will remember to buy the items for the projects I want to to most.  Call me weird, but that is how my brain operates.  So, here is another list.  I guess I can now add that I keep lists on my blog as well as the other various places I tend to tuck them away.  So, without much more ado, here is my list of crafts I want to make in 2013 in no particular order. 

Bracelet made out of lace, maybe a necklace too!

Braided t-shirt scarf

Cardigan made out of old t-shirts

Bangle covered in metal and painted

Loopy t-shirt scarf

Bowl made out of a record

Six projects doesn't seem too bad.  Of course I currently have several unfinished projects in the basement, but at least now I have a list of what I want to create for next year!  

Tuesday, January 8, 2013

Hint, Hint, Hint


Here is a little hint as to what my next tutorial will be on!!!!  Only a couple of days away!!!

Tuesday, December 18, 2012

Super Easy Christmas Ornaments


Yep - I am only doing one post on a crafty Christmas project.  Things have been a little bit busy and I like to put my friends and family first (especially around the holidays!).  I have been able to do a lot of fun things this season.  I baked Christmas cookies, only 4 kinds this year but I made our favorites.  This year I also put up and decorated the tree.  Last year I got the tree up but never got around to decorating it.  I was sad afterwards that I spent so much time on other things that I didn't get to truly appreciate the beauty of Christmas decorations.  So, this year I also pulled out and put up the rest of our decorations including putting some extra lights up.  I have to say it looks very pretty at our house and I am really looking forward to opening presents up with my hubby in a beautifully decorated room. 

Now, enough about me!  Onto the tutorial.

You will need:

Clear glass or plastic ornaments
Paint 
Yep, I am making a Packer ornament!  I can't help it, I bleed green and gold!

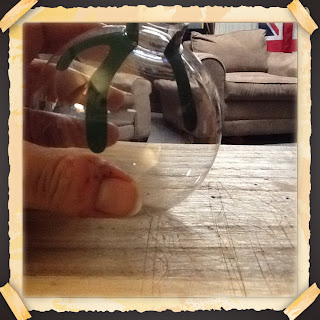
First, pull out the metal top part of the ornament. 

Next, squeeze some of the darker color paint into the ornament. In this case I started with the green.  I couldn't actually get a picture of myself squeezing in the paint because I needed one hand to hold the ipad.
 Let that drip of paint flow down the side of the ornament, then as you see fit add more drips and move the ornament around so the paint drips and drops throughout the ornament. 


 Once you are happy with the drips of the first color let it dry for about a half an hour to let the paint get a bit tacky.  Then, add your second color.  Start with one drip into the top and let it flow down, twisting the ornament to cover any of the still clear parts. 


After the ornament is completely covered let dry overnight. 
Then, the next day put the top back into the ornament. 

Viola! You are done!

I made a bunch of these because they were so fun and so EASY!!!!


Thursday, December 13, 2012

Ties - Final Pics

Well, the baby shower is over!  It was a huge success and I think everyone had a great time.  Below are some pics of the finished stash of decorations and goodie bags, plus some pics of the decorations on the day of.